
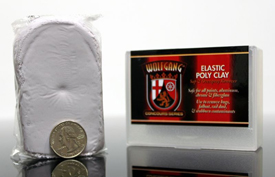
Wolfgang Elastic Poly Clay Review
The Wolfgang clay bar is a professional grade clay and works great for removing above-surface bonded contaminants like tree sap, air-borne pollution, industrial fallout, overspray paint, railroad and brake dust, etc.
Right out of the cellophane wrapper the clay is a little tacky and this helps the clay to capture and hold onto the contaminants you're removing. I wold like to point out that after you mist some spray detailer onto the clay, this dramatically reduces the tackiness of the clay.
How-To
The Wolfgang Elastic Poly Clay bar is a hefty 200 gram bar of detailing clay that can easily be broken up into 4 - 50 gram clay bars if you like, or even 2-3 larger clay bars depending upon your personal preference.
Some people like the feel of a large fat patty of clay when claying their paint while others understand that all that's needed is a round patty of clay about 4" to 5" in diameter to provide ample surface area for removing above surface bonded contaminants. The thickness or thinness doesn't matter as only the surface area is doing the work. Since clay gets used up as it fills up with contaminants, it's actually better to use thin clay patties so that you get the most use out of your clay bar. Once the clay is full of contaminants, you then throw it away.
You can easily get 4 pieces of clay out of one 200 gram clay bar and you can use each clay portion multiple times before it needs to be replaced. How many times of course depends upon how contaminated your car's finish is to start with.
The Wolfgang clay bar comes sealed in a cellophane wrapper to keep it clean. Here's a U.S. quarter for comparison to give you an idea of the size of a 200 gram clay bar.

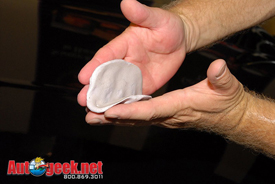
I've broken the 200 gram clay bar into 4 equal pieces and then kneaded one into a round patty about 4" in diameter while rolling the other 3 segments into round balls of clay. Then I formed all 4 into round patties of clay approximately 4" in diameter.A clay patty approximately 4" in diameter is a good general size for most people's hands.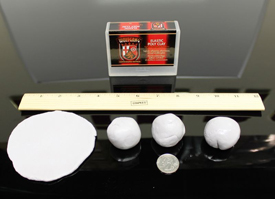
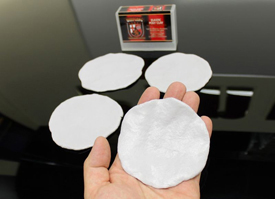
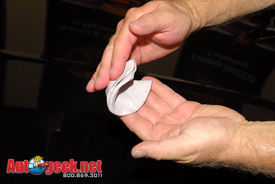
When using a clay patty, hold it in your hand with your fingertips protruding past the end of the patty. Don't hold it in a way where your fingertips are covered by clay as you'll tend to apply more pressure to your fingertips and push holes through the clay before you're ready to knead it. Not a big deal because you can always re-knead your clay to make a new patty but it's nice to do this when you decide, not when your clay patty decides for you.
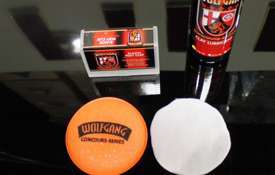
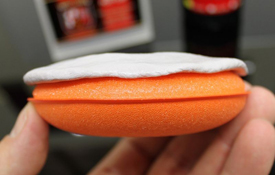
Another point of reference as to what size to form your clay patty is about the size of an average foam applicator pad. In this example, here's a 4" Wolfgang foam applicator pad.
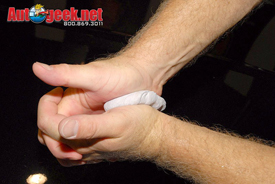
From a horizontal point of view you can see that you don't need a thick patty of clay, a thin patty works well also as the only portion of the clay that's working for you is the face or surface of the patty.
For my review, I'm going to use just one of the clay portions and save the other 3 portions in a Zip-Lock baggie for a future detailing session.
The demo car is well kept but sits out side 24 hours a day and while parked at home there are nearby trees that release tree sap. When I inspected the finish it had a rough, textured feel to it, which is a sure sign that the paint needed to be clayed.
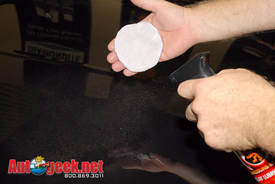
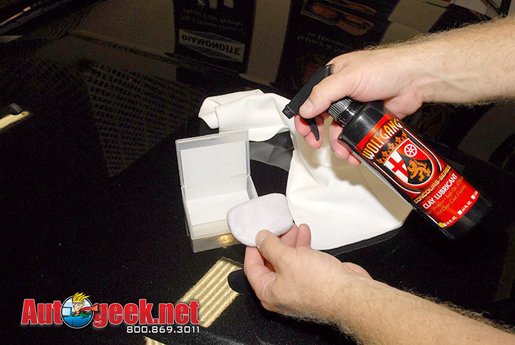
First I sprayed some Wolfgang Clay Lubricant onto the clay itself and then onto the section of paint to be clayed. The goal is to ensure there is plenty lubrication between the clay and the paint to enable the clay to glide over the surface.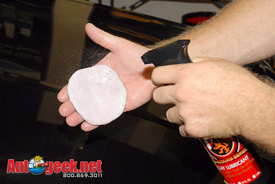
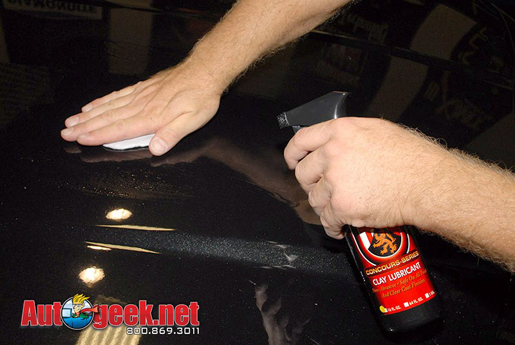
Next I rubbed the clay patty back and forth over an area about 16" inches squarish or so. At first you will feel the clay grabbing a little bit -that's normal. As you continue to move the clay over the paint it will remove more and more above-surface bonded contaminants and then will start gliding effortlessly. This is a pretty good sign that this area is now clean and smooth and you can wipe off the lubricant residue and then move onto a new section.
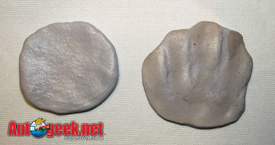
After claying about half the hood I stopped and turned the clay over and laid it next to an unused clay patty to show the accumulation of above-surface bonded contaminants on the surface of the clay. Notice the brown tint the clay on the right side has.As you clay, periodically turn your clay patty over and inspect the surface. When it appears to have a film of contaminants on the surface, stop and take a moment to fold the clay over into itself a couple of times and then you can re-knead it to expose fresh, uncontaminated clay material.

When you're finished claying the paint, if it's still in usable condition, you can spray a little clay lubricant into the original container or a clean, Zip-Lock baggie to store it for future use.
Additional Comments
If you're new to detailing and/or new to using detailing clay, here's some additional information on the importance and benefits of detailing clay.
Detailing Clay Safely Removes Above Surface Bonded Contaminants
Over time, if your car is parked outside for any length of time during each day then any dirt or air-borne contaminants that land on the paint will tend to bond to the paint if they are not removed in a timely manner. Once they bond to the paint some of them won't come off just from normal washing. This is where detailing clay comes into the picture.
Detailing clay uses a special abrasive that has the ability to basically sand off any contaminants sitting on top of the surface off without instilling scratches into your car's paint at the same time. In the old days, people would use coarse rubbing compounds to remove above surface bonded contaminants and while these types of products would work they would also instill scratches into the paint and at the same time remove perfectly good paint. That's two negative things you don't want to do your car's precious clear layer of paint.
Detailing Clay Restores a Smooth Surface.
Everyone agrees a GREAT looking finish is a GLOSSY finish and gloss comes from smoothness. As airborne contaminants build-up on your car's paint, they create texture or a bumpy or irregular surface and this reduces gloss. Simply claying your car's paint will restore the paint back to the smooth surface it had when it was new and this will restore gloss.
Detailing Clay Enables Your Choice of Wax or Paint Sealant To Last Longer.
You see chemists create wax and paint sealant formulas to bond or adhere to paint which is a type of resin; they don't create their formulas to bond or adhere to layers of dirt build-up. The build-up of contaminants on your car's finish is a film or layer of dirt over the paint and this film prevents your choice of wax or paint sealant from properly bonding to the paint. By washing and then claying your car's paint, you will enable your choice of wax or paint sealant to better bond to the paint and thus last longer.
The order in which to use detailing clay.
After washing, claying the paint should be done before trying to remove swirls and scratches. A common question goes like this,
Should I clay first and then use a polish or swirl mark remover? Or use a polish first and then clay?
The answer is:
First go after the defects sitting on top of the surface to get them out of the way (above-surface bonded contaminants). Then go after the defects that are in the paint (below-surface defects).
Above Surface Bonded Contaminant = Tree Sap, Overspray Paint, Industrial Fallout, Rail Dust, Industrial Fallout and Air-borne pollution
Below Surface Defects = Swirls, Scratches, Type II Water Spots and Bird Dropping Etchings